
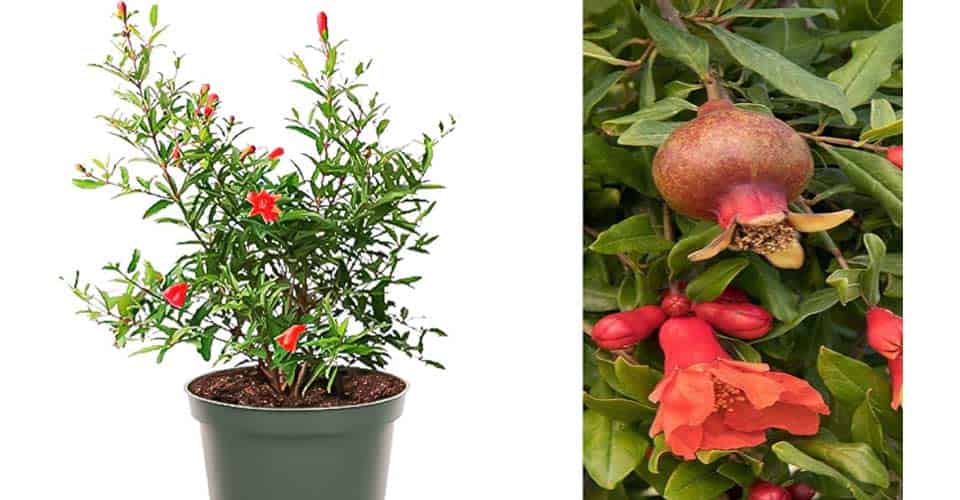
Pomegranates are a delightful addition to any garden because of their colorful fruits and lovely blossoms. However, did you know a simple cutting may be used to grow your pomegranate trees?
With this economical technique, you may raise a tree that resembles its parent and even provide delicious fruit! This is a thorough blog post on growing pomegranates from cuttings:
Also Read; 15 Examples Of Plants That Grow From Stems
Right Time and Material To Propagate Pomegranate from Cuttings
The right combination of material and time is critical for successfully propagating pomegranate plants from cuttings. Let’s examine these crucial elements in more detail:
1. Timing is Key
When pomegranates are dormant in late winter (about February in most climes), which may differ in most countries, it is the best time to take cuttings. This timing makes the most of the tree’s inherent qualities.
The pomegranate uses its energy reserves to sustain fresh development in the approaching spring rather than actively expanding during hibernation.
By taking cuttings during this period, the parent tree is not as stressed, and the cutting may focus its efforts on developing roots rather than competing with existing growth processes.
2. Selection Of Ideal Cutting
your cutting from which a pomegranate tree will come out matters. Here are the tips for your ease. Just following these tips increases your chances of successfully propagating a new tree.
i). Healthy is Wealthy:
Always select cuttings from disease-free, healthy pomegranate trees. Steer clear of branches that exhibit any indications of fungi, insects, or physical damage. Your cutting is more likely to inherit the resilience and vigor of its parent tree if it has a healthy parent tree.
ii). The Old Wood:
The best wood to harvest is from the growth from the previous year, often called “year-old wood.” This wood is both too old and woody and too young and sensitive. One-year-old wood finds the right mix between being mature enough to support healthy root growth and flexible enough to bend without breaking.
iii). Diameter Matters:
Locating the Firm Basis of Support: Seek for branches measuring between ¼ and ½ inch (6 mm and 1 cm) in diameter. Branches in this range provide an excellent compromise between sufficient surface area for the production of roots and the sturdiness necessary to hold the cutting upright throughout the rooting process.
iv). Length Matters Too:
Allowing Enough Space for Development A cutting length of around 8 to 10 inches (20 to 25 cm) is good. This length guarantees that the cutting has at least two or three buds while providing adequate stem for roots.
The sites from which new growth will emerge are called buds, and the likelihood of effective propagation improves when there are several buds.
You’ll give your pomegranate cuttings the most excellent chance of flourishing and growing into solid pomegranate trees by adhering to these recommendations for timing and material choice.
Also Read: How To Store Potatoes For Long-Term Use
Preparation Of Pomegranate Cuttings for Successful Rooting
To successfully propagate roots from a cutting of a pomegranate tree, the cutting must be adequately prepared. A deeper look at the two crucial phases is as follows:
1. Making Clean Diagonal Cuts:
i). Sharpness counts: Using sterilized, sharp pruning shears to guarantee clean cuts. Growing roots might be hampered by dull instruments that break or crush the stem. The act of sterilizing aids in stopping the spread of illness.
ii). The benefit of diagonal positioning: Carefully cut on a diagonal, about ¼ inch (6 mm) below a bud. There are two uses for this angled cut:
iii). Greater surface area: Compared to a straight cut, the diagonal cut produces a greater surface area at the cutting’s base. This encourages more excellent root development and improves interaction with the potting mix.
iv). Better water absorption: A diagonal cut facilitates more effective water absorption by the cutting.
2. Make Nodes Available for Rooting:
i). Removing leaves: Remove the cutting’s lowest 2-3 inches (5-7.5 cm) leaves. Although it may seem paradoxical, there is a significant advantage to this:
ii). Root growth zone: A stem’s nodes are where roots start to grow. These nodes are visible on the naked stem after removing the lower leaves. This enables the plant to concentrate its energy on developing roots at these stages instead of using energy on leaf maintenance.
These preparatory actions provide the perfect conditions for the cutting’s roots to emerge, improving your chances of successfully reproducing a pomegranate tree.
Also Read: Best Tips To Grow Sweet Potatoes In Containers
Benefits of Rooting Hormone
Rooting hormone is not necessarily required for the effective multiplication of pomegranates, but it might be a valuable tool to take into consideration, particularly for:
i). Faster Rooting:
Auxins such as IBA (indole-3-butyric acid) are often found in rooting hormones, promoting root cell division and growth. This might shorten the waiting period by several weeks by wildly accelerating the time it takes for your pomegranate cutting to grow roots.
ii). Higher Success Rates:
Rooting might be more difficult for certain pomegranate kinds, especially seedless cultivars. An additional boost in rooting hormone might increase the likelihood that your cutting will successfully establish a robust root system.
iv). Weaker or Stressed Cuttings:
Rooting hormone may help make up for and promote root formation if your cuttings are not ideal—perhaps because they are a little thinner or exhibit mild indications of stress.
Tips for Rooting Hormone Use

Rooting hormone use is optional but a very effective technique for healthy growing. If the roots of a plant are healthy, then the plant will stand and nourish properly. Here are the tips:-
i). Read the Label: Rooting hormones are available in different formulations and strengths. For information on correct dilution and application methods, always refer to the detailed instructions included on the product label.
ii). Application Methods: Rooting hormones come in liquid, gel, or powder form. Each could apply in a slightly different way. One frequent method is to dip the cut end of the stem for a few seconds.
iii). Not a Magic Bullet: Although rooting hormone has advantages, success cannot be accelerated by using it. For root growth, choosing healthy cuttings appropriately, creating the right atmosphere, and providing regular care is still essential.
Alternatives to Rooting Hormone:
• Natural Methods: Some gardeners investigate natural substitutes that could have some root-promoting qualities, such as honey or willow water. However, there hasn’t been much study on how well they work with pomegranates. It is ultimately up to you to utilize the rooting hormone.
It may be helpful if you have less-than-ideal cuttings or want to speed up the rooting process. However, you may still successfully propagate your pomegranate tree without rooting hormones if you follow the proper procedures and take good care of it.
Also Read: The Integration of Technology in Kitchen Gardening
Planting the Pomegranate Cutting:

The following provides a more thorough explanation of how to sow the pomegranate cutting to maximize rooting success:
i). Selecting the Right Pot:
• Size: Choose a pot with a minimum diameter of 6 inches (15 cm) for a single cutting. This provides enough room for the first growth of roots.
• Drainage: To avoid waterlogging, ensure the pot includes drainage holes at the bottom. Too much moisture may cause rot, which prevents roots from growing.
ii). Getting the Potting Mix Ready:
• Light and airy: Using a potting mix that drains effectively is essential. Combining these is a wise choice:
• Potting soil: This supplies the cutting’s foundational nutrients.
• Perlite: These lightweight volcanic rocks enhance aeration and drainage.
• Sand (optional): Sand helps the mixture stay loose and offers additional drainage. Try to get a ratio of one part perlite to two parts potting soil (optional).
• Moisture level: Give the potting mix a little shake before planting. When squeezed, it should feel moist but not drenched.
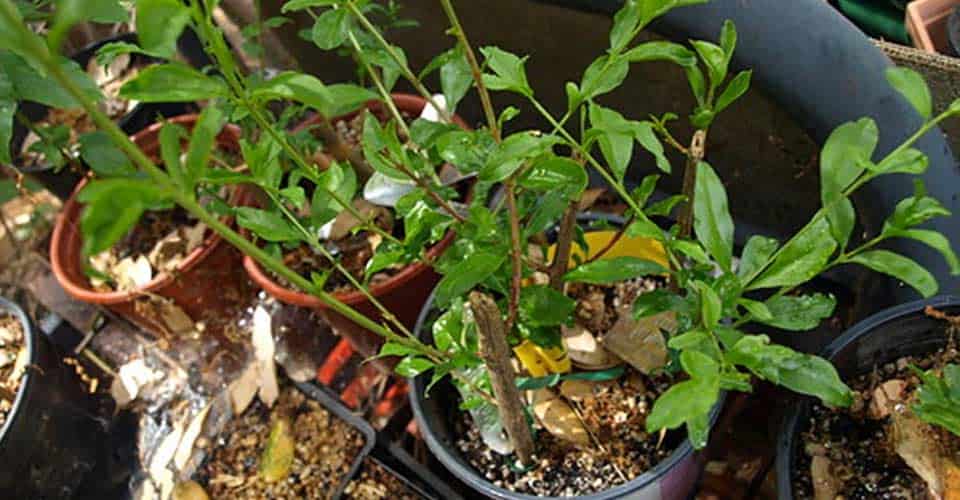
iii). Planting the Slice:
• Depth and positioning: Gently place the prepared cutting in the potting mix up to two-thirds to one-half of its length. This guarantees that enough of the stem is buried for root growth.
• Where to put the buds: Ensure two or three are still above the earth. New leaves will ultimately emerge from these buds when the cutting takes root.
• Firming the soil: To keep the cutting securely, gently press the potting mix around its base.
iv). Watering Well (Once):
• Watering: After planting, water the pot well to let the soil settle around the cutting. Ensuring optimal contact between the stem and the wet mix encourages the formation of roots.
• Avoid overwatering: After the first irrigation, do not overwater. The roots may be suffocated by soil that is too damp. The soil should always be somewhat wet but not drenched. Only rewater after the top inch of soil is completely dry.
These instructions will help you provide the perfect conditions for your pomegranate cutting to grow a robust root system, leading to effective propagation.
Also Read: Pros & Cons of Container Gardening: A Comprehensive Guide
Establishing a Proper Rooting Environment

The key to successfully propagating pomegranates from cuttings is to create an environment that resembles optimal growth circumstances. Here’s a thorough explanation of the three things you should concentrate on:
1. Light: Indirect, bright sunlight
• Justification: Photosynthesis, the mechanism by which pomegranate cuttings transform light energy into fuel for development, requires sufficient light. Direct sunshine, however, might be too intense for fragile cuts, particularly in the harsh afternoon sun.
• Optimal Location: Pick a spot that gets robust and indirect sunlight most of the day. The ideal location is beside a well-lit window with sheer curtains or a shady south-facing window.
• Observing: Take note of your trimmings. It may receive too much direct sunlight if the leaves droop or turn brown at the margins. You may move things about or cover the light with a shade cloth to filter the light.
2. Humidity: Sustaining a Wet Environment
• Significance: The area around the cutting must have high humidity levels for several reasons. It assists in preventing excessive transpirational loss of moisture from the leaves, which is an essential activity for healthy plants but troublesome for cuttings with shallow root systems. Furthermore, root formation is promoted by a humid environment.
3. Techniques for Preserving Humidity:
i). Clear Plastic Bag (with Ventilation): Use a transparent plastic bag to loosely enclose the pot. This retains moisture around the cutting by producing a miniature greenhouse effect. To avoid moisture accumulation and possible rot, ensure the bag has enough Ventilation by making a few tiny holes.
ii). Humidity Tray: Pour water and stones onto a shallow tray. As you place the pot on the tray, make sure the bottom of the pot stays away from the water. The cutting’s surrounding area becomes more humid as the water evaporation rises.
iii). Observing: Increase Ventilation by adding holes to the bag or taking it out for brief periods if condensation is pouring excessively from it or the leaves appear wet.
4. Temperature: Warmth Promotes Growth
• Ideal Range: An ideal temperature range for root formation is between 65 and 75°F (18 and 24°C). This simulates the warm soil temperatures that pomegranate plants love.
• Positioning Considerations: Keep the pot away from heat sources or cold gusts that can cause temperature swings.
• Heating Mats (Optional): A bottom heat pad may gently warm the soil from below, encouraging quicker root development. But watch out for adequate monitoring, as too much heat might harm the cutting.
Your chances of successfully reproducing your pomegranate tree from a cutting may increase significantly by creating a favorable climate with indirect solid light, constant humidity, and proper warmth.
Also Read: 15 Different Styles of Vegetable Gardens
Taking Care of Pomegranate Cuttings
Watering Maintaining a steady moisture level is essential for the longevity of your pomegranate cutting, but drowning it may also be harmful. Here’s how to find the ideal balance:
i). Finger Test: Make it a habit to check the moisture content of the soil often. Place your finger up to the first knuckle in the potting mix. Water it now if it seems dry to the touch. On the other hand, wait a few days before watering if it seems chilly or moist.
ii). Watering Technique: Aim for a gradual, uniform soaking while applying water. Till water is completely drained from the pot’s bottom, thoroughly wet the soil, this guarantees that moisture reaches the whole root zone. Steer clear of shallow watering since this will moisten the soil’s surface layer while leaving the roots underneath dry.
iii). The Virtue of Patience: Rooting a pomegranate cutting takes time and patience. If you don’t get results right away, don’t give up. How to control your expectations is as follows:
iv). The Game of Waiting: You may have to wait weeks or months for roots to erupt. This period may vary according to variables like humidity, temperature, and general health of the cutting.
v). Tracking Development: Pay close attention to what you’re cutting. Keep an eye out for indications of fresh development, like little green leaves poking out of the buds. This is a good sign that the cutting is taking root and becoming established.
vi). Hardening Off: An Itemised Shift: It’s time to get your pomegranate cutting ready for life outside (if that’s your ultimate objective) after it sports robust new leaves. It takes this hardening-off procedure to prevent transplant shock from happening.
vii). Introducing the Outdoors: To begin, set up the pot outside in a protected spot for a few hours daily. Increase the amount of time spent outside over a few weeks. This enables the cutting to acclimate to the temperature, wind, and sunshine fluctuations it will experience in its permanent habitat.
viii). Transplanting: You may move the cutting to an enormous container or straight into your garden bed if it seems to have acclimated to the outside environment. Select a spot that receives plenty of sunshine and soil that drains properly.
You can give your fresh pomegranate cutting the best possible conditions to grow into a robust, healthy tree by being patient and following these thorough care recommendations.
Also Read: Best 25 Essential Tools To Start A Kitchen Garden
Extra Advice on Growing Pomegranate Cuttings
Although the previously described fundamental procedures provide a solid basis for pomegranate tree propagation, the following further advice may help your technique and increase your chances of success:
1. Multiple Cuttings in a Pot:
• The pace is essential: Make sure cuttings are planted in single pots with a minimum spacing of 4-6 inches (10-15 cm). This promotes healthy air circulation and avoids crowding, which may impede root development and growth.
• It could be essential to thin: If many cuttings root in the same pot, you might need to separate them later. Choose the most robust, vigorous plant to prevent resource competition and gently eliminate the others.
2. Rooting Hormone:
• Pay close attention to the label: Although rooting hormones may be helpful, adhering to the precise directions on the product label is essential. Application techniques and dilution ratios could differ throughout brands and formulas. The right concentration is used to guarantee maximum efficacy without damaging the cutting.
• Alternatives to commercial products: For a more organic method, consider putting the stem’s cut end into honey before planting. Honey may promote the growth of roots and has minor antimicrobial qualities.
3. Bottom Heat Mat (Optional):

• Promoting root emergence: Faster root growth may be achieved by gently warming the pot’s base using a bottom heat pad. This is especially helpful in colder areas where it may be difficult for soil temperatures to reach optimal levels.
• Temperature control: Choose a heating pad with a thermostat to manage the temperature. For ideal root development, maintain a constant soil temperature of around 70°F (21°C).
Remember that propagating pomegranate cuttings requires patience. You can grow a healthy, happy pomegranate tree from a basic cutting if you pay attention to these extra suggestions and give it regular attention.
Also Read: How to Start a Kitchen Garden: A Comprehensive Guide
Conclusion
Growing pomegranate trees from cuttings is a satisfying and economical method of adding a tree to your landscape that will look just like its parent. The stages above provide a clear path to achievement, even if the process requires patience.
Recall that the selection of healthy cuttings for dormancy, the provision of a well-draining environment, and the maintenance of constant hydration are essential considerations.
Proper hardening off will prepare your baby pomegranate for its future in the garden once roots take hold and new growth emerges. You may soon experience a homegrown pomegranate tree’s beauty and perhaps richness with a bit of perseverance.
Keep Reading
- Fast Growing Vegetables in Pots
- Revolutionize Your Garden with Solar-Powered Tools
- Fastest Growing Vegetables: From Seed to Table in No Time
- Unearthing Expert Tips to Start a Garden From Scratch
- How to Make Money with Gardening
Recent Posts
Here is reply of high-demand removable wallpapers. The wallpaper industry has changed a lot in recent times, with the launch of removable wallpaper being seen as a blessing for homeowners, renters,...
Brown is an often neglected color when considering interior design but brown decor living room ideas could make your house feel warm, sophisticated, and timeless. More adaptable than any other...